1. Preparation
Gently, sand the surface if necessary, with 220 grit sandpaper for a smooth finish.
2. Prime the surface
Ensure that the surface is sufficiently primed with a water-based primer.
3. Apply the bole or the base colour
Once the primer is fully dry, you are ready to apply the base colour for the leaf. The colour you use now will have a significant effect on the final look of your gilded object. To get a vibrant old red colour for both genuine and imitation gold leaf use red bole but if you want a yellow shiny gold colour then use a yellow bole colour. Remember the base color will be showing through on the finished gilded object. Best practice is to do a test first, one with yellow bole and another with red bole, just one leaf for each to see the results.
Choosing the right Bole: Bole is made from clay, and they come in three colours: red (Terra-cotta), black and yellow. The red colour adds warmth to both gold and silver leaf. A yellow bole colour creates an overall gold shiny appearance and hides any cracks on the gilded surface. However, a black bole colour creates a cold and hard look, which is suitable for Neoclassical, and Art Deco look.
4. Apply the gilding size/adhesive
Not all gilding sizes are suitable for all surfaces, please read: Which gilding size is best for a particular surface. The gilding size will bond the leaf to the surface. For interior gilding, use a water base gilding size. Use a brush to apply the size making sure that you create an even film all over the surface that need gilding.
5. Water-based size/adhesive
Water-based Gilding size usually has a working period of 30 minutes up to 24h to apply the gold leaf. However, sometimes it dries faster while applying the gold leaf and in some cases, it leaves some brush strokes. To avoid this problem stair the adhesive regularly just before using.
6. Applying the Gold Leaf
Gold leaf (loose): The gold leaf is placed in paper booklets, loosely inlaid in 25 compartments, one for each leaf. To cut the leaf, one may take it from the booklet with the gilding knife and place it on the gilding cushion or drop it directly from the booklet onto the gilding cushion. Then, pick up the leaf with the gilder’s tip and place it onto the prepared surface.
Gold leaf patent (Transfer): The individual gold leaves are pressed onto a tissue paper. One uses patent gold, also called tempest gold when gilding outdoors. The tissue paper is larger than the gold leaf. Thus it may be more easily handled. It is also possible to cut the patent leaf into desired shapes or forms with scissors. The leaf is placed onto the prepared surface (Instacoll Gilding Size) and carefully rubbed with wool brush or Kölner Instacoll Tissue. The tissue paper may then be removed as the gold leaf will adhere to the surface/object.
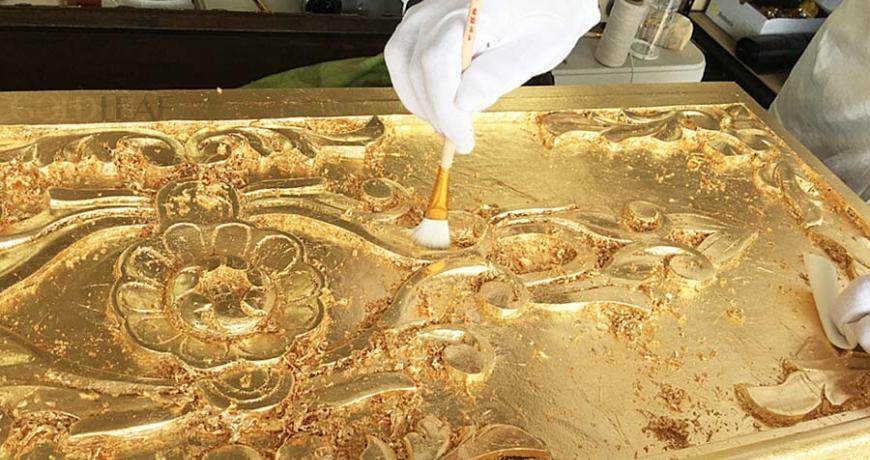
7. Burnishing the leaf
If you are using water-based gilding size, then use a soft brush to clean any excess of gold flakes. Do not use regular painter’s brushes because they will scratch the leafs and wipes off the shiny gold finish. Instead, use gilding brushes. Professional gilders use an agate stone burnisher for water gilding, which is easy, move your hand in all directions while pressing down softly.
8. Finishing quality
Search for areas that you have missed and apply some gold leaf to cover up all surfaces to your liking and burnish them too.
9. Seal the gilded surface
no need to apply varnish to 23k gold leaf and above, however, 22k and down you must apply a film of varnish to protect the gold leaf, especially the imitation one, use Leaf Protect or make your own using Shellak, which will protect the gold leaf from tarnishing and ensure durability, especially in high traffic areas or for heavy use objects and furniture.
10. Old and Antique
To create an antique finish, use Patina Aging on acryl base to simulate aging. Patina comes in red, brown, and transparent.
For gilding without making gesso and clay read: Kolner KGGG System
- The above was a short and quick explanation of how to gild, if you have a question about gilding then do not hesitate to ask us, we are gilders too, and we may be able to help you.