Gilders’ powder is an incredible solution for achieving a stunning high-gloss finish in water gilding! It’s wonderfully user-friendly—grab the amount you need without the hassle of adding glue. This means you can work with precision and no waste, making every project more enjoyable. One of the fantastic features of this powder is its limitless shelf life. You can mix just the right amount required for your project, which is a game-changer. Plus, unlike traditional burnishing clay, the Polishing Ground eliminates the need for a paste, making the process smoother than ever. It’s perfect for anyone, even those new to the art of water gilding.
To get started with the Gerstendörfer Polishing Ground Powder, mix it in a 1:1 ratio with distilled water. After a brief resting period, you can easily apply the polishing ground using a soft Kolner brush, even in its cold state. Dive into your creativity with confidence—this powder is here to make your gilding journey enjoyable and successful!
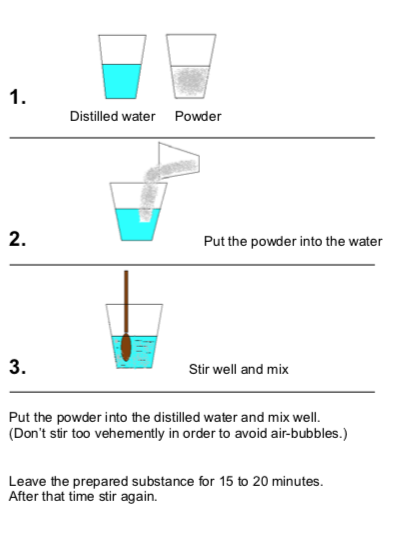
Suggestion for the preparation:
1- Add one portion of distilled water to 1 portion of polishing size powder, for instance, 10g of distilled water and 10g of polishing size powder. In case you need it thicker, you can add more powder. Pay attention not to create a brush stroke.

2- After that time, stir again. Now the first application can be made. Always close the tin after using.
3- Use a soft hair-brush. Oval or large gilding brushes are suitable. The brush is not too small to avoid grooves.
4- Don’t apply in too thin layers and work only in one direction. The polishing size is dry in 20 to 30 minutes and covers well afterwards.
5- Before applying the next layer, let it dry thoroughly. Act equally with the second, third, and possibly the fourth application.
6- When everything has dried well after the last application (after about 3 to 4 hours), due to the brush, minor imperfections may have appeared. You can remove them with a piece of abrasive paper or the Sanding Sponge 180g.
7- The dried polishing size must now be polished with a polishing steel wool pad or a wool cloth. Thus, the surface is condensed and the gilding water stays better on the surface.
8- To avoid stains afterwards, please don’t touch the surface with your fingers. We recommend using the Gilders Cotton Gloves.
9- You can now start gilding, spread the gilding water (usually a mixture of distilled water and one teaspoon of alcohol) on the surface you want to gild. Put the genuine gold or silver leaves on it.
10- This gilding technique is only for the loose leaf.
11- Avoid spreading too large portions of the water, as it dries quickly, and the gold-leaf won’t stick to dry ground.
12- After applying the gold leaf, let it dry well (2 – 3 hours) and then polish well with Agate Stone Burnisher. Sometimes, you can try to polish earlier, but if the surface is not perfectly dry, you might damage the gold leaf.